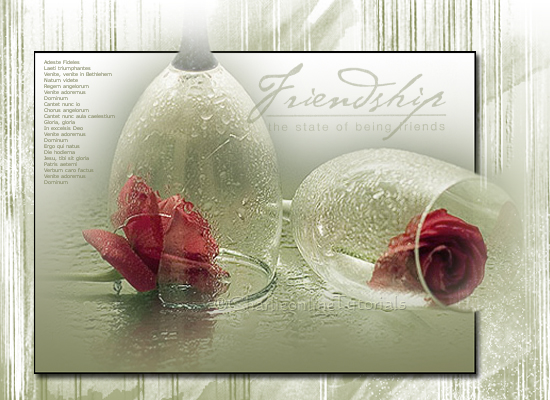
TwoRoses PS-Tutorial
Copyright © Charlieonline.it 2002 - 2025Tutti i diritti riservati
Return to Tutorials
Based on a tag en PSP
created by my friend Tixolina...lol
Copyright © Charlieonline.it 2002 - 2025
Tutti i diritti riservati
Any resemblance to any other tutorial is purely coincidental.
Please feel free to link to this tutorial,
and/or print it out for your own personal use,
BUT do not upload, share, or re-write or translate it without permission.
Besides you may not script it and sell the script.
You may not sell works from my Presets or Tutorials
All my works are for personal use only, and with no profit-websites
A link to this site's required!
Thank you!
This tutorial was written using PS Cs5
but may be done with other versions,
and assumes you have a good working knowledge of PS and its tools.
I thank a lot ©Nina from
LorettabWeb
for the good advice she gave me
to run the tutorial...lol
| Supplies needed: |
|
Brushes by Touchstone and Adriana
Tube by Lizztish
Settings
Extract and save the .png file to a folder of your choise.
Extract and save the brush_TixTut.abr
to the brush folder of PS or other of your choice.
Extract and open the two-roses-two-glasses_lizztish.psd
and minimize it to your Ps workspace.
Before starting the tutorial we are going to convert png attachments in brushes
( I got this .png file from some .PSPbrushes)
Active for example the 09Touchstone.png,
Edit - Define Brush Preset
to define your new brush.
I would recommend naming it
so that you know where it came from,
in order to give proper credit later.
Make the same for: Adriana015.png, absolutely.png e girlfriendship.png
But if you like, attached there are my converted brushes
After you have saved the attached one
Select the Brush Tool from your ToolBox

Reset the brushes and load the brush_TixTut.abr
Use the drop down arrow beside the brush tip preview window
to see the brush tip previews.
Use the arrow in the right hand corner
of the brush tip preview window, to show the sub menu.
Select: Load Brushes
Look for the brush_TixTut.abr you saved
and click to load it
Now .....
Let's begin!
1 - Open a new transparent canvas 550px x 400px
Rename as Base
Set your Foreground color to white
and Background to #838762
Select the Gradient tool
and at the Gradient Toolbar make this settings:
Color: foreground/background
Gradient Styles: Linear
Mode: Normal
Opacity: 100%
Right click and drag the cursor from the top
to the bottom of your canvas
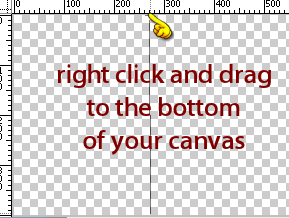
Let go of the mouse button.
Your image should look like this
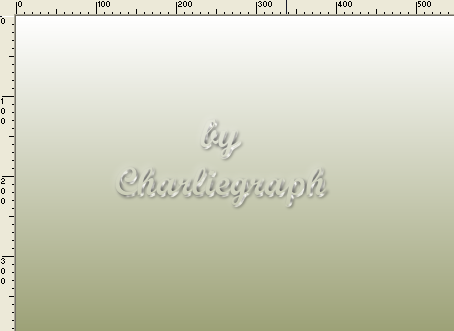
2 - At the bottom of your Layer Palette click the Create New Layer button
and rename as brush1
Switch your foreground/background colours using the arrow.
So that you have your darker colour in front.
Select the Brush tool
Go to the Brush Toolbar option
Click the small drop down arrow beside the Brush preview
and choose 09Touchstone brush (the number 344)
to begin brushing your canvas
leave default settings
Brush your canvas
until you have something like this
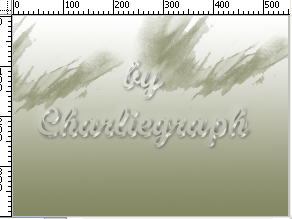
Switch again your foreground/background colours
So that you have white colour in front
and brush your canvas as follows
or as you like
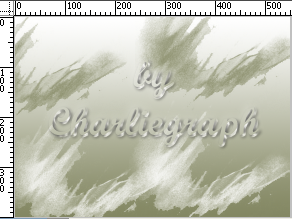
Leave your foreground to white
3 - Return to your Brush tool and choose brushes n. 255
On the right of your workspace you have a Brush floating dock

If you don't have it go to
Windows - Brush
click on it and set so:
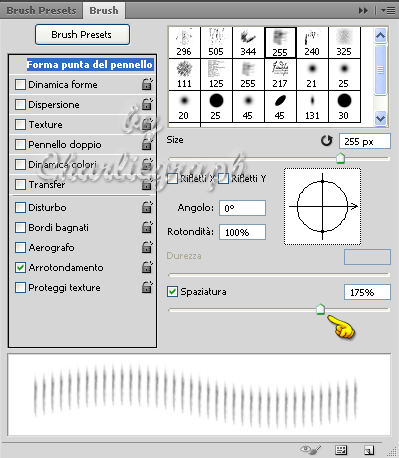
then brush your canvas
Do this also for n. 240 and n. 505
and all the other brushes in the supplies
alternating white and dark colours continue your brush
until you have something like this
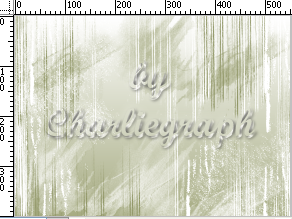
Note: I recommend using a new layer
for each brush and color,
so that if you don't lile the result
you can delete it.
Name them....brush2, brush3 and so on
4 - With white color to foreground
click on your RectangleTool and draw a rectangle like this:
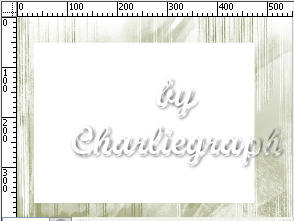
Rename as base2
At the bottom of the Layer Palette click the 'fx' button
In the Blending Option, click on Drop Shadows
and change your settings to match mine:
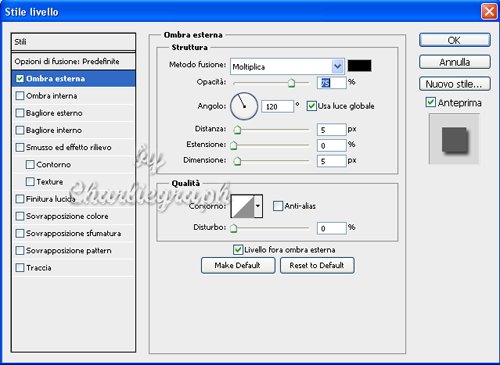
now select Gradient Overlay
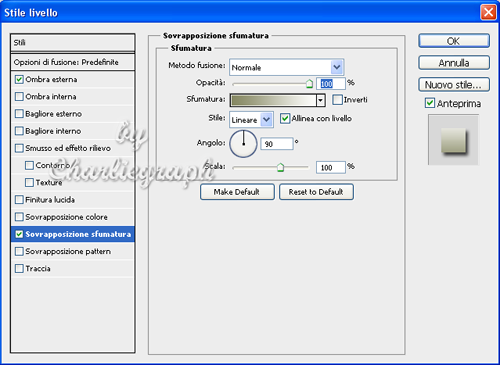
and Stroke
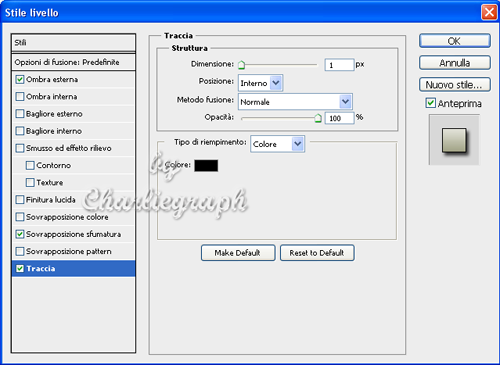
Your image should look like this
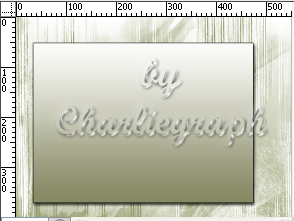
Layer - Smart Objects - Convert to Smart Object
Layer - Rasterize Layer
5 - Change the foreground to darker color
Select the Brush tool
choose brush n. 125 (the absolutely text brush)
Add a new layer
and brush your canvas as the finished work
From your brush tool choose also friendship brush
e brush your canvas in another new layer
use finished work as example
6 - Highlight your two-roses-two-glasses_lizztish.psd file
and with your mouse drag it on your working image
Now select your base2 layer,
make sure it is highlighted
because we have to delete some parts
of the layer where the glasses are transparent
Click on the Poligonal Lasso Tool
set Feather to 1px
and draw out 2 selections like these
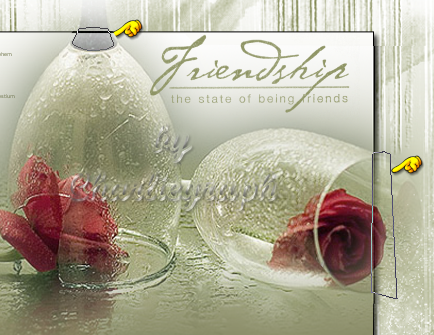
Hit the Delete key on your Keyboard
Select - Deselect
Repeat steap for any residue
Put your name or watermark
Add a little border if you like
and save as .jpg or .png
Done!
Hope you have enjoyed this tutorial.Written on February 2012
Return to Tutorials
My Tutorials are Registered at TWI

Per informazioni o suggerimenti
If you like write a message to my "Contatti"
Se hai dubbi o ti servono chiarimenti posta un messaggio nei "Contatti"
Copyright © Charlieonline.it 2002 - 2025
Tutti i diritti riservati
Torna all'inizio


Questo Sito è pubblicato sotto una Licenza (This website is licensed under a)
Creative Commons Attribuzione - Non commerciale - Non opere derivate 2.5 Italia License.
Pagina aggiornata... sabato 17 ottobre 2015
Tempo di caricamento 0.54 secondi.
Copyright © Charlieonline.it 2002 - 2025
Tutti i diritti riservati